iMobie PhoneRescue Review: Does It Work? (Test Results)

PhoneRescue for iOS
요약
iMobie PhoneRescue is a data recovery software for retrieving files deleted or lost from Apple iPhone, iPad, and now Android phones and tablets as well. iMobie claims that the app can recover a wide range of file types including photos, messages, notes, contacts, call history, calendar, reminders, and third-party app data. The program is available to download on both PC and Mac.
During my test of PhoneRescue for iOS (Mac), the full version did recover many kinds of files, but it couldn’t recover everything due to its limitations and the nature of data recovery. In this PhoneRescue review/tutorial, I’ll show you the pros and cons, as well as my personal takes on using this software. I’ll also explain the reasons why I gave iMobie PhoneRescue the ratings I did.
내가 좋아하는 것: Four recovery/repair modes maximize chances of retrieving data. It can work without connecting the device which is great for when your phone is faulty, damaged, or lost. Directly export certain types of files back to your iOS device or download a copy to computer. The quality of recovered files is high.
내가 좋아하지 않는 것: Tend to find a lot more files rather than you actually deleted. Recover from iCloud mode does not offer much value.
What is iMobie PhoneRescue?
It is a software developed by iMobie (an Apple Certified Developer) to help mobile phone users rescue deleted or lost data. You can use it to directly scan an iOS/Android device to recover deleted files, extract iTunes and iCloud backups to restore your lost files, and repair iOS device issues.
Is PhoneRescue malware?
I tested the program on my HP laptop (Windows XNUMX based) and MacBook Pro (macOS). PhoneRescue is XNUMX% free of viruses or malware and doesn’t contain bundled third-party programs.
Is PhoneRescue safe to use?
Yes, it is. The scanning process performs read-only procedures and thus won’t affect your existing device data. When you attempt to recover files, it’ll ask your permission before accessing data from iCloud, for example. That said, I still recommend you back up your phone or tablet before using the program.
Is PhoneRescue free?
PhoneRescue has two versions: trial and full. The trial is totally free to download, use, and allows you to scan and preview certain types of files that it finds. However, you can’t save or export the files. To actually recover and save your files, you’ll need the full version — activated by purchasing a legal software license.
How much is PhoneRescue?
There are three types of licenses with PhoneRescue: The Lifetime license costs $XNUMX, the XNUMX-year license costs $XNUMX, and a XNUMX-month license costs $XNUMX.
Can I use PhoneRescue on my phone?
No, you can’t. PhoneRescue isn’t a mobile app that you can install on your iOS/Android device. Instead, you need to connect your phone to a computer that installs and runs the program.
차례
Your Guide Behind This PhoneRescue Review
My name is David. I’m just a normal iPhone user who happens to be a bit techy.
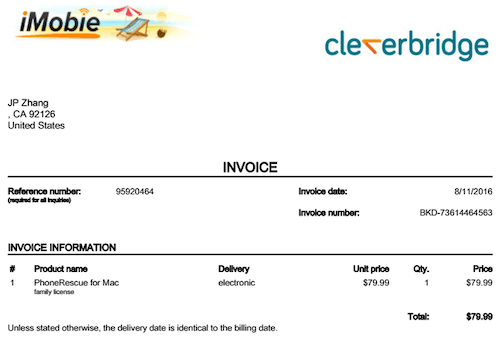
Before I wrote this review, I spent $XNUMX and purchased the Family license (the old pricing model) on my own budget with the intent to test both the PC and Mac versions of PhoneRescue. I have never asked or used any free licenses from the iMobie marketing team. Also, I’m not sponsored to write this review. All the content in this review is purely my own opinion.
Considering that PhoneRescue is a powerful software that offers dozens of features to rescue iPhone data from a variety of scenarios, it was impossible for me to test each feature. I don’t have a faulty iOS device, I don’t use certain apps (e.g. Line) which iMobie claims the program can recover data from, etc. However, I did test the program as well as I could.
As such, I disclaim that this PhoneRescue review is primarily based on my limited testing of the software, the information available on iMobie’s website, and the email responses I received from the iMobie support team. Please note the opinions in this review are my own, and they may not be accurate with the passage of time.
PhoneRescue Review: My Test Results
Note: the latest version of PhoneRescue is XNUMX. The screenshots in the review below were initially taken from version XNUMX. But the content should still stand. Also, the program seems more powerful than before. Besides iPhones and iPads, you can use it to rescue deleted or lost files from Android devices as well.
While I tested both the Windows and Mac versions of PhoneRescue, I’ve used mainly screenshots I took from the Mac version. The user interface of both versions is almost the same, but I’ll point out if a feature in the Windows version is different from the Mac version.
To start with, the download and installation process is easy and straightforward. Launching the app gives you a sense of elegance: It begins with a quick animation of the PhoneRescue icon circling itself, followed by another window called “Quick Tips.” This window lists a few things users should keep in mind in order to maximize the chances of iPhone data recovery. Once you’ve read it over, click “I’m Ready to Start”.
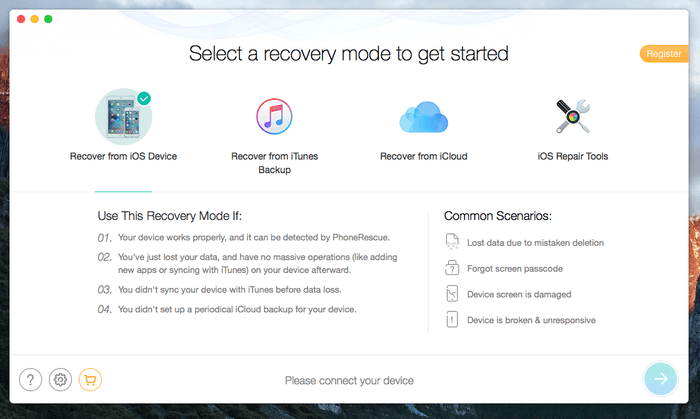
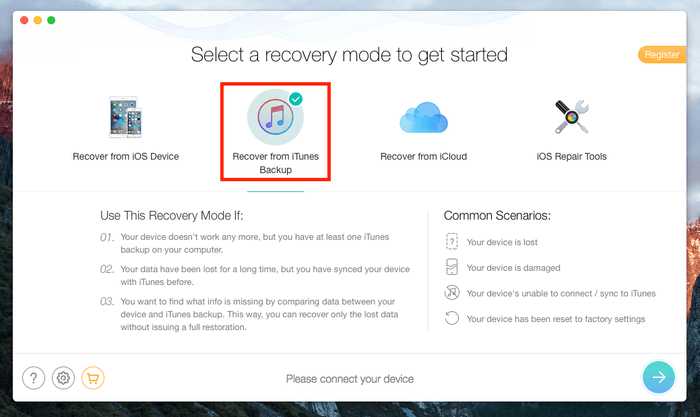
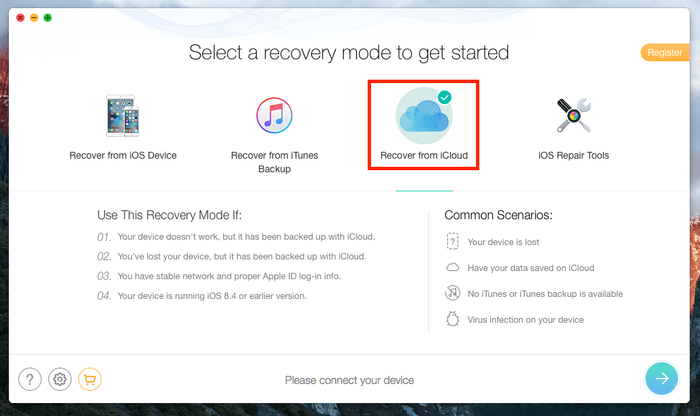
After that, you’ll see a screen like the one below. This is the core of PhoneRescue, and lists four main recovery modes: Recover from iOS Device, Recover from iTunes Backup, Recover from iCloud, and iOS Repair Tools. Each mode deals with a specific type of data loss situation. I’ve broken this review into four subsections in order to dig into each recovery or repair mode. I also added a separate section exploring the export feature.
XNUMX. Recover from iOS Device
This mode is best for recovering items you’ve just deleted from your iPhone including, pictures, videos, notes, messages, etc. Most likely it’s because you didn’t have any backups, and can’t retrieve the content from iTunes or iCloud. This mode requires that your iOS device be recognized by your computer.
Here’s how my test went: After connecting my iPhone, I noticed that on the bottom of the screen, the text “Please connect your device” immediately turns to “Your ‘iPhone’ is connected!. Also, the color of the arrow button in the right corner turns from light blue to dark blue, meaning it is now clickable. Hit it to continue.

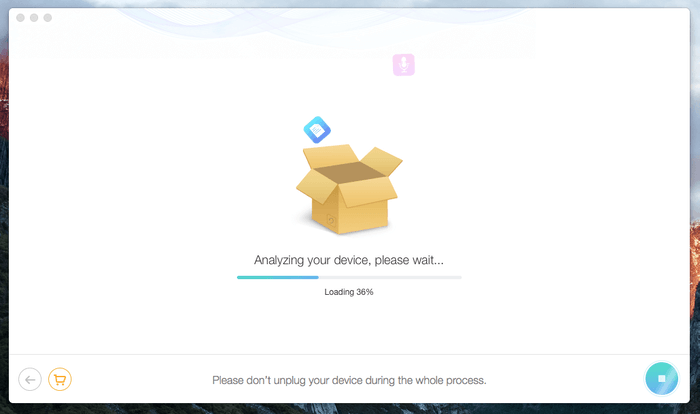
Then the app started to analyze my device. The process took less than a minute. Tip: Don’t unplug your device during this process.
Within a few minutes, it successfully found a lot of files — XNUMX, to be precise — including:
- Personal Data: XNUMX Contacts, XNUMX call history, XNUMX messages, XNUMX message attachments, XNUMX voicemails, XNUMX Notes, XNUMX Safari bookmark
- Media Data: XNUMX photos, XNUMX Photo Videos, XNUMX thumbnails, XNUMX songs, XNUMX playlists, XNUMX voice memo.
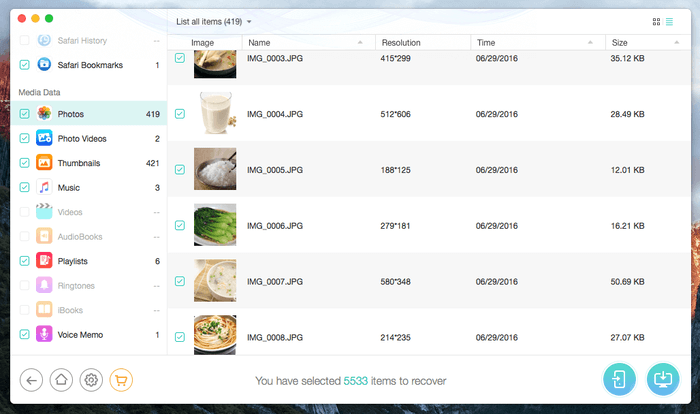
내 개인적인 테이크: The whole process is really quick. It only took a few minutes to scan my XNUMXGB iPhone and extract all the recoverable data. While it’s nice that PhoneRescue found so many files from my iPhone, they found a bunch I’d already deleted, like pictures, voicemails, and a voice memo. However, I was a bit surprised that it listed items that were still stored on my phone — messages, contacts, call history, etc., that I’m pretty sure I never deleted. So, PhoneRescue “exceeded” my expectations. However, this might make it a bit hectic for locating specific files you want to retrieve.
XNUMX. Recover from iTunes Backup
This second recovery mode is best to use when your iDevice doesn’t work anymore, and you’ve got at least one iTunes backup stored on your computer. Select this mode, then click the arrow on the bottom-right corner to get started. Here’s my experience with this recovery mode.
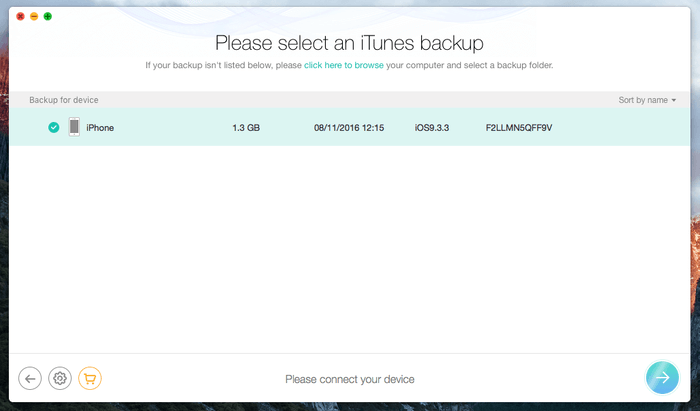
It found an iTunes backup for my iPhone…
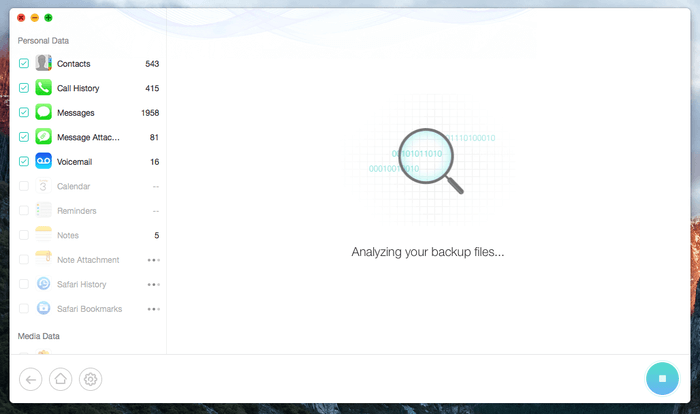
…analyzed the backup file and extracted the data…
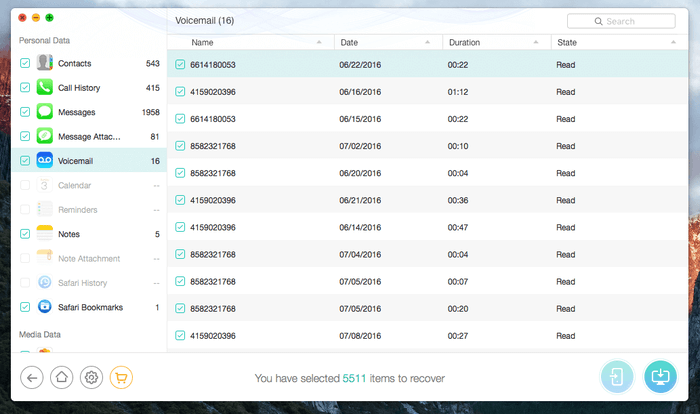
…then displayed XNUMX files. This is quite similar to the result I got from the first recovery mode (XNUMX items).
내 개인적인 테이크: This recovery mode is like an iTunes backup extractor. It doesn’t require you to connect your device, thus it’s perfect for rescuing data when your iPhone is physically damaged or can’t be detected by your PC or Mac. PhoneRescue automatically finds the iTunes backup file and extracts content from it. If you use iTunes, you should know you can use the software to backup and restore any iOS device. However, I feel this recovery mode from PhoneRescue is superior to the Apple method for several reasons. First, you can’t see what’s included in the iTunes backup file until you restore your device via the Apple guide. PhoneRescue allows you to preview the content and then selectively restore deleted files. Second, the Apple iTunes restore method erases all your current data, while PhoneRescue doesn’t.
XNUMX. Recover from iCloud
This third recovery mode works best when you’ve backed up your iOS device via iCloud, or have enabled iCloud sync across your devices.
유의하시기 바랍니다: Here, there is a difference between the PC and Mac versions. The Mac version only supports iOS XNUMX or earlier — NOT later. The Windows version supports iOS XNUMX and XNUMX (I think there’s a typo in the instructions of the Windows version — see screenshot). iMobie claims that this is due to Apple’s security limitations on Mac.

To get started, select the “Recover from iCloud” mode and hit the blue button to continue. This is how it worked for me:
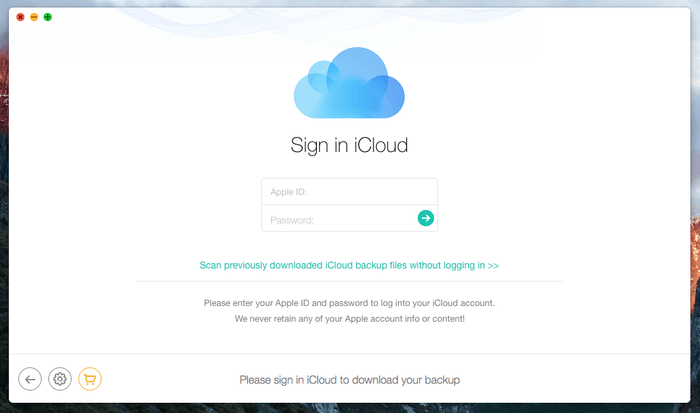
It asked me to sign in iCloud (with my Apple ID). Pay attention to the text description: iMobie claims they will never retain any of your Apple account info or content. Nice! I hope they keep their promise; I’m really concerned when I’m asked to type my Apple account credentials into third-party apps or websites.
After inputting my Apple ID and password, it found all the devices that have enabled iCloud backup. I need to choose a backup to download before I can move forward.
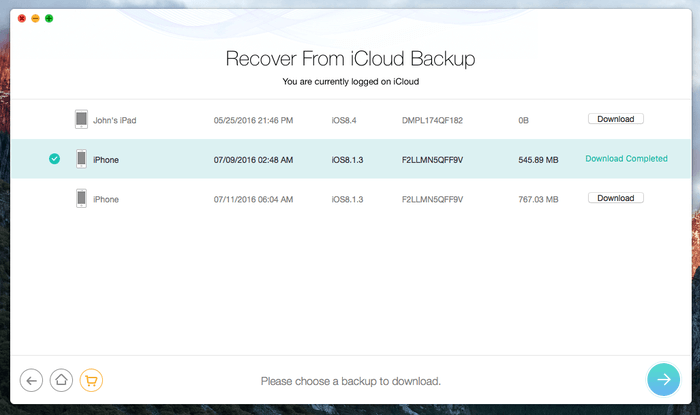
It found XNUMX items from my iCloud backup — not bad. But hold on, this is exactly the same as what I’d see on iCloud.com. I have to wonder: What’s the point of adding this recovery mode?
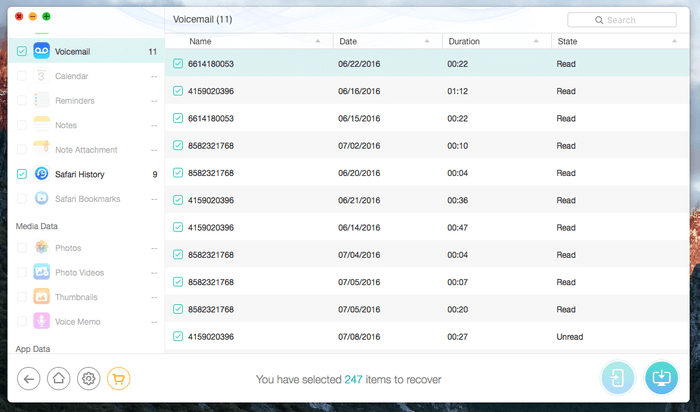
내 개인적인 테이크: This is the part that I’m a bit disappointed with. This “Recover from iCloud” mode is no different from Apple’s iCloud.com method. I can simply go to the official iCloud.com, log in with my Apple ID, and look for my files by navigating through the web app (see below). To me, this mode doesn’t offer much value.
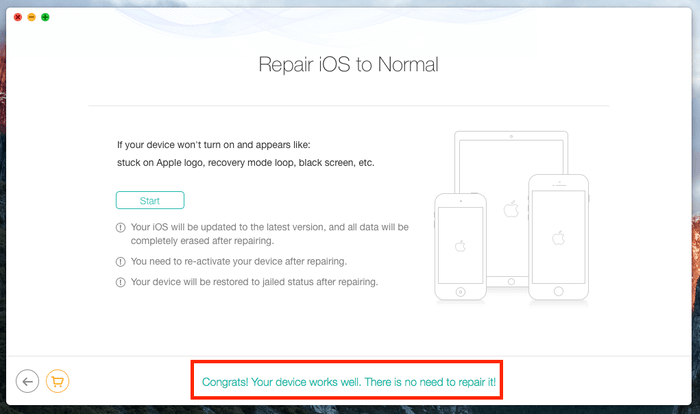
XNUMX. iOS Repair Tools
This is the fourth module of PhoneRescue. Unfortunately, I can’t test it because I don’t have a faulty iOS device. According to iMobie, this recovery mode is best to use when your device is stuck on a black screen or Apple logo, or keeps restarting. When I click the blue button to continue, you can see it says my device works well, and that there is no need to repair it.
As such, I can’t give my own personal take on this repair mode. If you have the chance to use this feature, please let me know what you think by leaving a comment below. I’ll gladly update this section and include your feedback here.
XNUMX. The Recovery/Export Feature
At the end of the day, it’s all about getting deleted or lost files back to your device or computer. The scanning process serves as the initial step so you can evaluate whether your lost data can be found and retrieved.
Unfortunately, the trial version of PhoneRescue doesn’t allow you to actually recover found files. You’ll have to buy a license code to activate the software, otherwise, the export or download buttons are greyed out. I purchased the family version, which costs $XNUMX. The activation process is smooth, all you need to do is copy the serial code, paste it into the small pop-up window, and you’re good to go.
I saved many files on my computer. There was no problem; the process is pretty straightforward. Also, I found the quality of recovered files is high. For instance, the images are all the same size (several MBs) as they were.
What I’m most interested in is the “Export” feature. iMobie claims I’m able to directly save the files back to my iPhone. I tried, and here’s how it worked for me.
First, I turned off the “Find My iPhone” app. Otherwise, you’ll see the warning message below. To do that, go to Settings > iCloud > Find My iPhone, click it, and tap to slide the button to grey. Don’t forget to turn “Find My iPhone” on again after you recover your lost files.
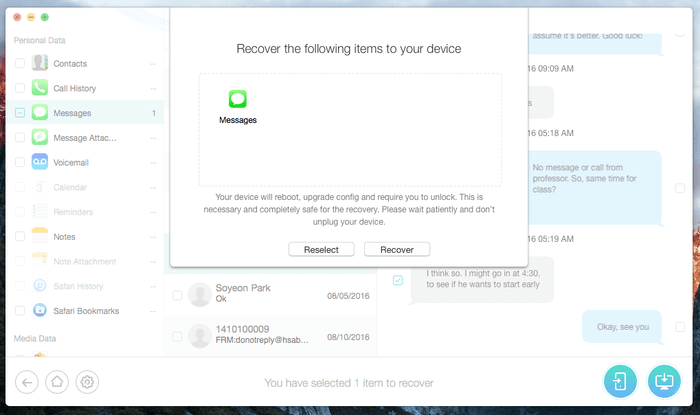
Next, I found I could only export certain types of files back to my device: Contacts, Call History, Messages, Voicemail, Calendar, Reminders, Notes, Safari History. I’m kind of surprised that photos and videos are not on the supported list.
To test, I selected a text message. Here’s what it said: “Your device will reboot, upgrade config and require you to unlock. This is necessary and completely safe for the recovery. Please wait patiently and don’t unplug your device”.
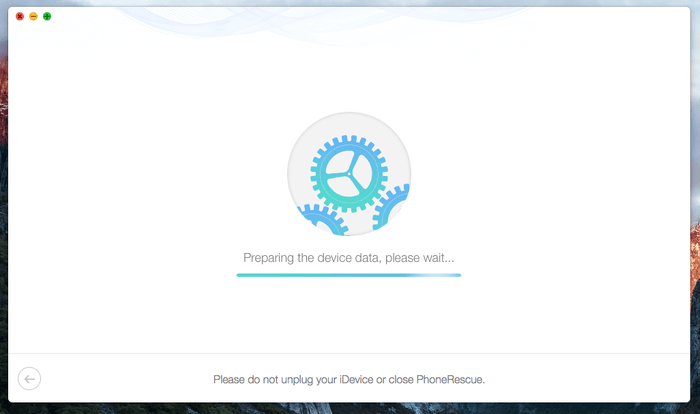
Once I clicked “Recover”. The screen looked like the one below, and I noticed my iPhone was restarting.
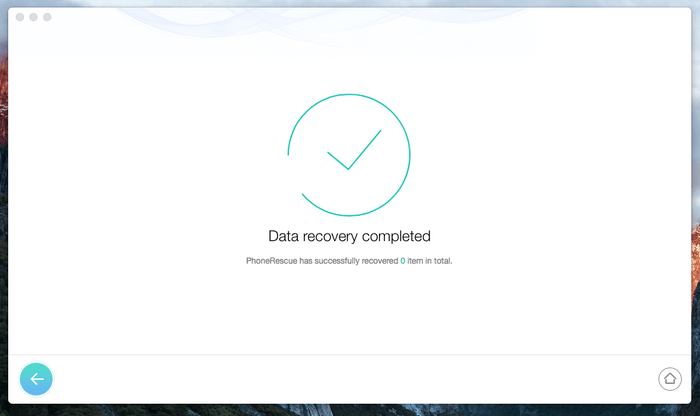
In several minutes, the process was completed. Surprisingly, it showed “Data recovery completed”, but underneath it also said “PhoneRescue has successfully recovered XNUMX item in total”. Seriously? I remember I selected one. Is this a bug?
[update — correction: the iMobie team explains that it is because the item I attempted to recover is already on my device. If it is recovered, there will be duplicates. PhoneRescue automatically skips the duplicates on an iOS device. So, this is NOT a bug!]
내 개인적인 테이크: It’s great that PhoneRescue offers an export feature that allows you to directly transfer lost files back to our iOS device. But I feel the process is a bit complicated and time-consuming. I had to turn off the “Find My iPhone” app and reboot my device to get it working. Plus, I can’t export photos and videos. In my opinion, it’s best to download the files to your desktop first, then examine the files closely before you manually export them back. That way should be safer and easier.
내 평가 뒤에 이유
효과: 4/5
Like I said, PhoneRescue works. It can recover many types of deleted or lost files from an iOS device. Thanks to the four comprehensive recovery modes, PhoneRescue is capable of dealing with a variety of different data loss scenarios. However, it tends to find many files that are not deleted or lost, which makes it harder to locate the items you actually want to recover
가격 : 3.5 / 5
Personally, I don’t like the pricing layers. A subscription costs almost the same as the lifetime price. Based on my understanding of the nature of data recovery, it’s rare that you’ll need such recovery software all the time. We only need it when disaster strikes, and after recovering the data (hopefully) we should learn our lesson and be extra cautious in the future.
In this sense, data recovery software is like a one-time shot: The value for future usage is quite limited if not none. Also, unlike system clean apps like CleanMyMac or security applications, this recovery software doesn’t have to be installed on every PC or Mac. Thus it doesn’t make much sense to add a subscription model in pricing.
사용 편의성 : 5 / 5
There is no question about the usability of PhoneRescue. Elegant user interface design and helpful text instructions make it incredibly easy to handle. Also, the four easy-to-understand recovery modes simplify complex data loss scenarios. Well done, iMobie team!
지원: 4/5
The iMobie customer support team can be reached out via standard email. They promise XNUMX/XNUMX support with a response time within XNUMX hours (usually much less). I emailed them several times, and they were quite responsive. The thing I think they could improve on is customer engagement. While I emailed them several times, they knew my first name but still used the generic “Dear Customer” salutation at the beginning of each email. I’m not sure if this is part of their customer relationship policy or not. I just feel an engaging conversation would make customers feel more valued.

PhoneRescue Alternatives
While PhoneRescue is a nice program that could help you rescue your lost iPhone data, it’s by no means the only one out there. In fact, if you’ve backed up your device via iTunes or iCloud, it’s often quite easy to restore all your lost files using Apple’s built-in apps.
That said, here’s a list of free and paid options in case PhoneRescue doesn’t help.
- iCloud에 (Web) — Free. If you’ve enabled iCloud backup across your iOS devices, chances are high to get back your lost files.
- Dr.Fone — Paid. An all-around software for managing data on iOS and Android devices. It can also recover deleted files, backup saved data, and more. Read our full Dr.Fone 리뷰.
- Stellar Data Recovery for iPhone — Paid ($XNUMX). Its features are quite similar to PhoneRescue.
You can also read our roundups of the best iPhone data recovery software 및 best Android data recovery software 추가 옵션.
결론
iMobie PhoneRescue is safe, and it does work to recover many types of files deleted or lost from an iOS or Android device. The program is intuitive and easy to use thanks to the efforts from iMobie’s design and development team. But, due to the complex nature of data recovery, it’s not XNUMX% guaranteed that you’ll be able to retrieve all of your lost files using this software.
It’s good to see that PhoneRescue provides four different recovery and repair modes to maximize the chances of recovery. However, each mode is not without problems. For example, the “Recover from iOS Device” mode tends to find more files than those you deleted, making it time-consuming to identify the files you actually want to recover. Also, I don’t see much value in using the “Recover from iCloud” mode, as it’s much easier to just log into iCloud.com and access your files via the web app.
Regardless, I think PhoneRescue is a good piece of software, and I like it. Imagine the fear and panic the moment you accidentally delete some precious pictures of your phone. PhoneRescue at least gives you some hope to recover that data. That said, I want to remind you again of the significance of data backup — use iCloud or an 외장 하드 드라이브 to make multiple copies of all your important files! That is the best way to avoid data loss.
Have you tried PhoneRescue? Did you manage to recover the deleted or lost files from your iPhone, iPad, or iPod Touch (or an Android device that I’m yet to test)? Either way, share your thoughts in the comments below.
마지막 기사