Animaker Review: Is This Animation Tool Good in 2022?

animaker
Samengevat
animaker is a DIY animation software that can be used for marketing, education, business, or personal videos in a variety of styles. The software is completely web-based (you don’t have to install anything) and very easy to get started with.
It uses a simple drag and drop interface to allow you to add/edit elements, as well as plenty of templates to get you started if you aren’t sure what you want your video to look like. There’s also an included library of images, characters, audio, and more that you can use in your video.
If you are looking for an online animation video maker that can produce animated videos without spending too much time, Animaker is a great choice. It is a freemium software and uses a subscription-based pricing model.
Wat ik leuk vind: Fair amount of characters and free material. Subscription plans offered are cheaper than those for many competing programs. Good variety of support materials and quick email response team.
Wat ik niet leuk vind: No autosave feature. This is incredibly frustrating when it has a tendency to freeze if you switch tabs. Often freezes and the page must be reloaded to regain functionality.
What is Animaker?
It is a web-based tool for creating animated videos in a variety of styles, such as infographics, whiteboards, or cartoons. You do not have to download anything to use it, and you can get started for free.
If you are interested in creating videos for educational, marketing, or personal purposes, it offers an easy-to-learn avenue and a good amount of media that you can use royalty-free. The animated styles are engaging and good for grabbing an audience’s attention.
Is Animaker safe to use?
Yes, Animaker is very safe to use. The program was first launched in 2022, and has maintained a good name since then. It’s entirely web-based, so you do not need to download anything to use it.
Furthermore, the site uses “HTTPS”, a secure type of web protocol (as opposed to regular “HTTP”). You can link your Google or Facebook accounts to Animaker, but these permissions can be revoked at any time you like.
Can I use Animaker for free?
Animaker is a freemium software. This means that while it does offer een gratis abonnement that users can take advantage of, in reality, you will need to purchase a subscription in order to utilize all of the features it offers.
Free plan users have access to most features of the editor, can make 5 videos per month (with watermark), and access some templates and media items. Paid users do not experience these issues and also get extra benefits. The free plan is a great way to experiment with Animaker, but you will ultimately need to purchase a subscription in order to get the most out of it.
Inhoudsopgave
Why Trust Me for This Animaker Review?
My name is Nicole, and just like you, I make sure to read reviews before I sign up with new software or decide to download a new program. After all, it can be hard to be completely sure if the software you want to use is safe if you’ll end up needing to purchase additional content to actually use the application, or even what’s actually inside the box.
My review of Animaker is completely based on my own experience using it. I signed up, tested the software, and collected information so you don’t have to – and it also means you’re seeing real screenshots and content from the program. You’ll be able to quickly decide whether Animaker is a good fit for you.
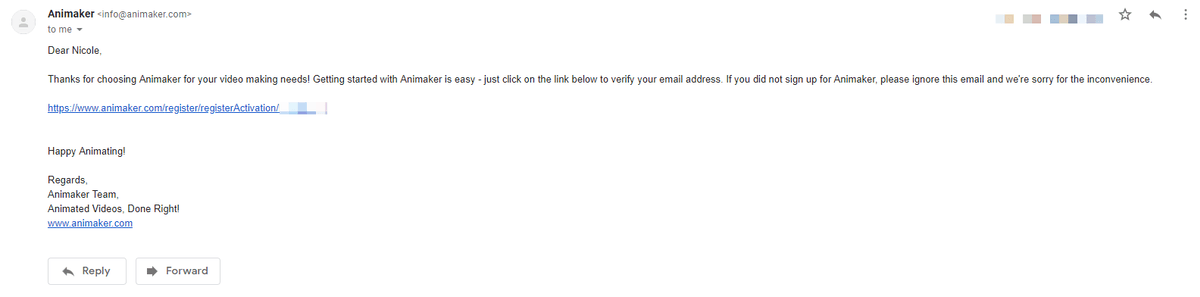
As proof that I have personally experimented with this program, here’s a screenshot of my account activation email:
Lastly, I am not endorsed by Animaker or any other company, so you can trust that my review is as unbiased as possible and represents only the real facts of how it works.
Detailed Review of Animaker
Ermee beginnen
Animaker is designed to be easy to use right away, but if you’re a bit confused, don’t worry! Here’s a quick guide to getting your first video set up.
When you first sign up, it will ask you to select what industry you plan to use Animaker for. This has no effect on the content you access besides pushing what it thinks are the most relevant templates to the top of your dashboard.
If you’re just experimenting, choose “Others”. After this, you’ll immediately see a dashboard that shows you the available templates so you can start a new video.

You can also just choose “Blank” in the top left if you aren’t interested in a template. Some templates are only available to certain tier users depending on the plan you’re using. Paid users can access “Premium” templates, while free users can only use “Free” templates. All the templates are categorized by type, and you can sort through them using the labels in the left sidebar.
After picking a template, you should be taken to the editor screen. Some users may encounter this warning first:
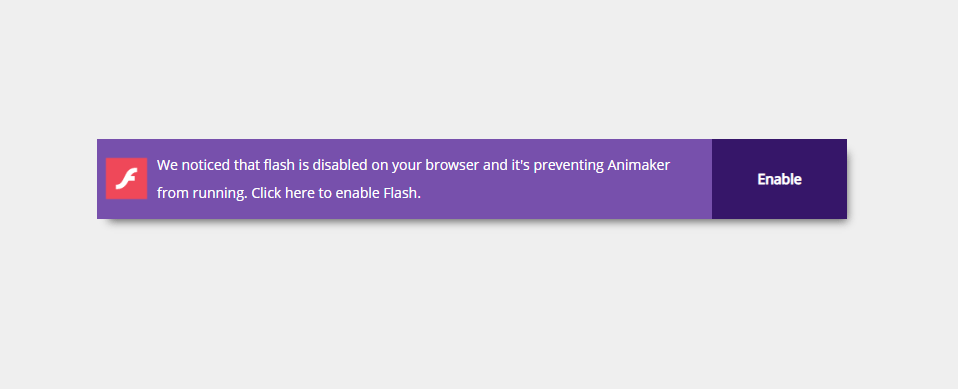
By default, many modern browsers disable Flash since it is quickly becoming obsolete. However, sites such as Animaker will need you to re-enable it to run properly. Just click “enable” and then agree when your browser prompts you to turn Flash on.
Once the editor has loaded, you will see this:
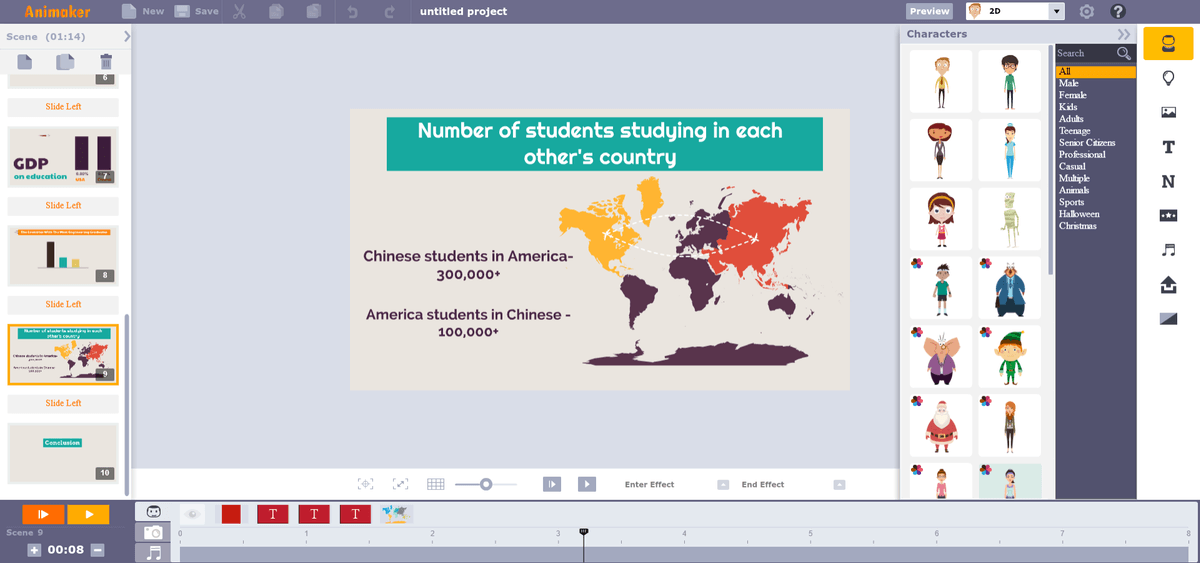
The content will vary depending on what type of template you selected, but the basic layout is the same. The left sidebar shows you scenes, while the right sidebar shows you media and design elements you can add. The center is the canvas, and the timeline is underneath.
From here, you can add content to a scene, create new sections for your video, and do all your editing.
Media en tekst
Animaker offers several different kinds of media, and they’re categorized as follows:
- Personages
- Vastgoed
- Achtergronden
- Tekst
- Aantallen
Each category has a tab on the right-hand sidebar and comes with some default materials (how many materials are available depends on what kind of plan you have).
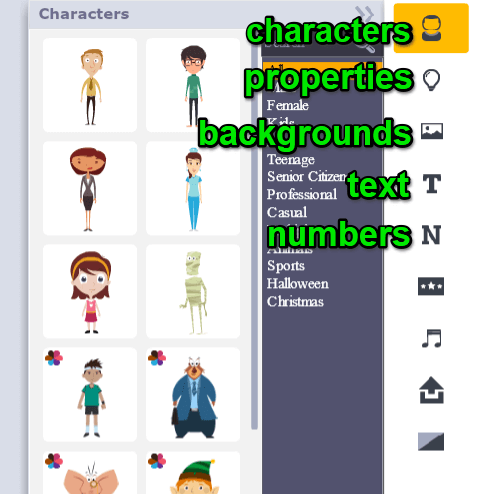
Personages
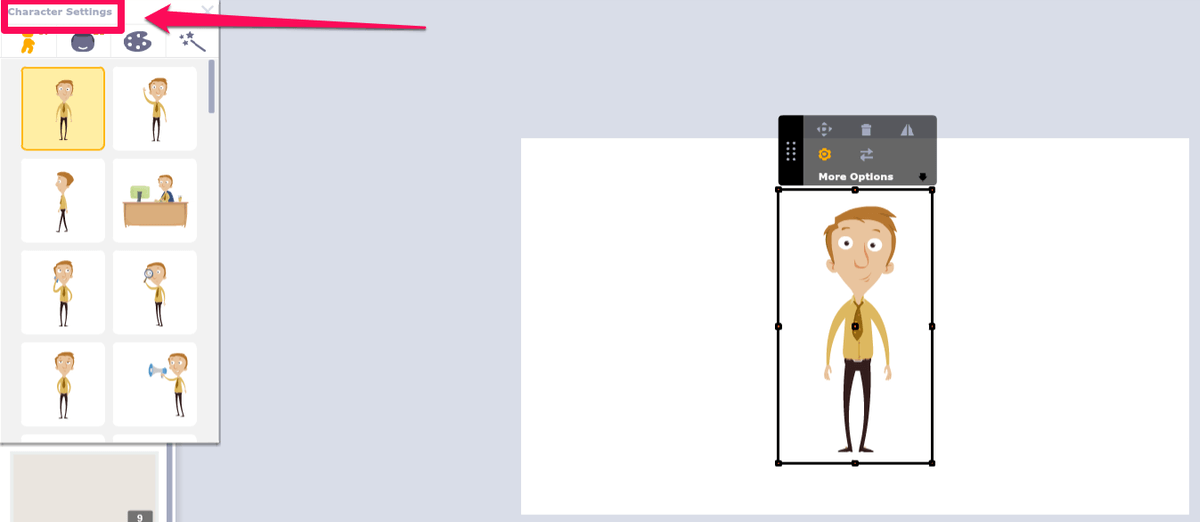
Characters are small images of the same person available in several poses and often several colors (denoted by the small multicolor flower in the left corner of their image). Many characters also offer alternate facial expressions in addition to the various poses. Free users can access 15 characters, while paid users have access to dozens.
Vastgoed
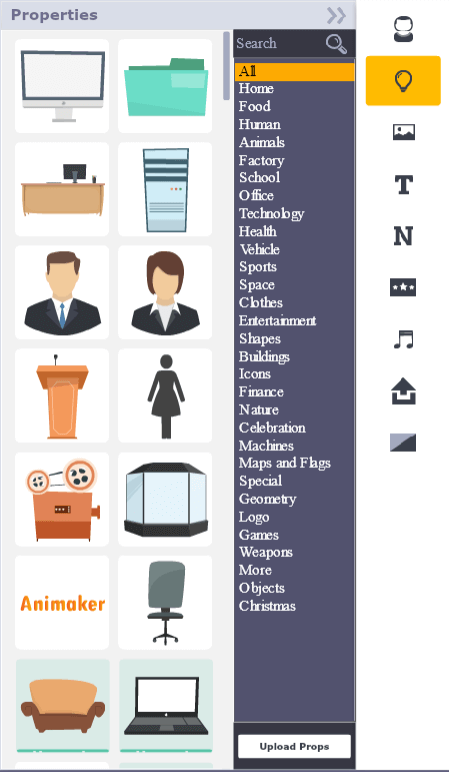
Properties are “props”, clipart, or background objects that you can add to your video. A good deal of these are available for free, but it wouldn’t be hard to import some of your own either. They are primarily in the flat design style. Some offer multiple “poses” – for example, the folder prop is available both laying closed and open. However, it appears that most props cannot be color changed.
Achtergronden
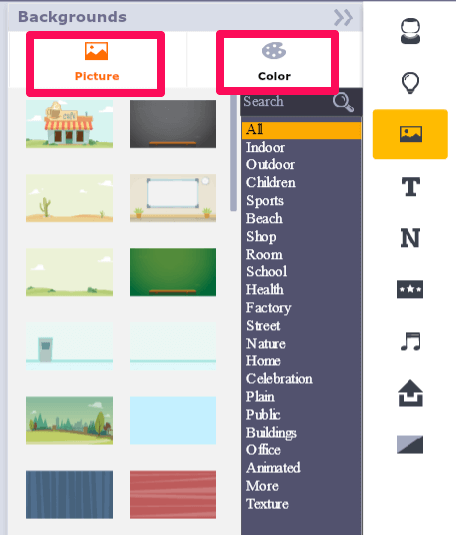
Backgrounds set the stage for your video. Some are animated, while others are simply still scenes that are good for placing your characters and props on. Backgrounds are split into two categories: Pictures & Colors. Pictures are the standard animated backgrounds, while the “color” tab is simply a place to choose a solid color background.
Tekst
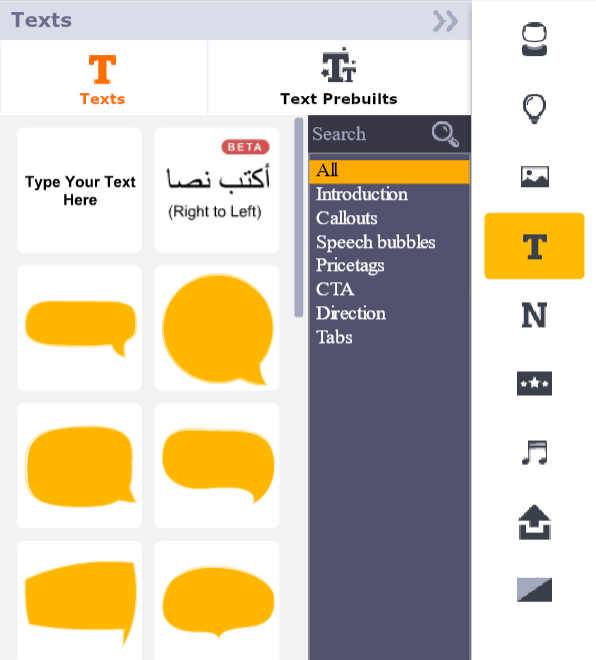
Text is a common form of media in animated videos. You might need it for a banner, heading, or information (especially in explainer videos or infographics). Animaker offers a lot of flexibility with text. You can always just drop a new text box, but you can also choose from premade templates or a large variety of speech bubbles and callout styles.
Aantallen
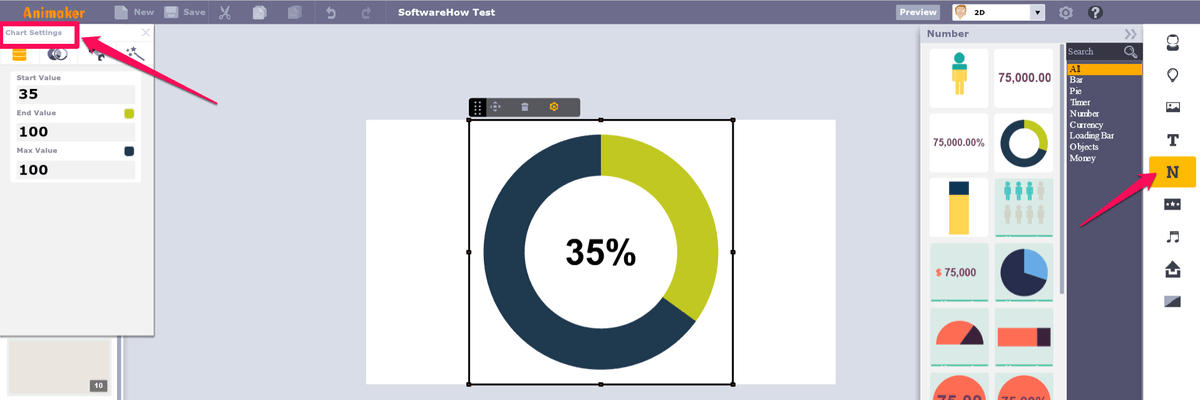
Although “Numbers” sounds like an oddly specific form of text, it’s a special category for a reason. Under “Numbers” you can find customizable charts and graphs complete with animations and extra features. From bar graphs to pie charts, you can add important data features to your videos very easily.
Uploading your own media
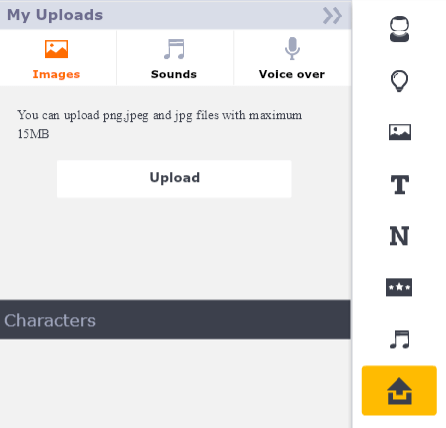
If Animaker is missing something you need (or if it’s paywalled), you can use the upload feature to add your own images to a video. This feature only supports JPEG and PNG files, so you won’t be able to make animated GIFs, but it should be enough for most users. Custom fonts can only be uploaded if you are a Business Plan user.
Audio
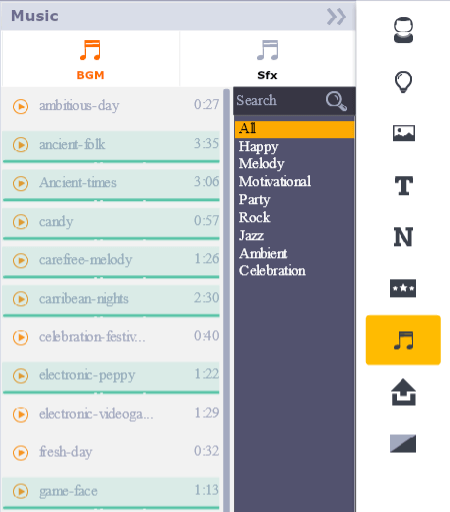
Audio is an important part of conveying the message in your video. The graphics may catch someone’s eye, but ultimately things such as narration, voice-over, and background music will keep them engaged.
Animaker comes with a library of royalty-free music you can use in your video (titles in green indicate you must be a paid user to access them). It also offers a selection of sound effects in addition to the background tracks.
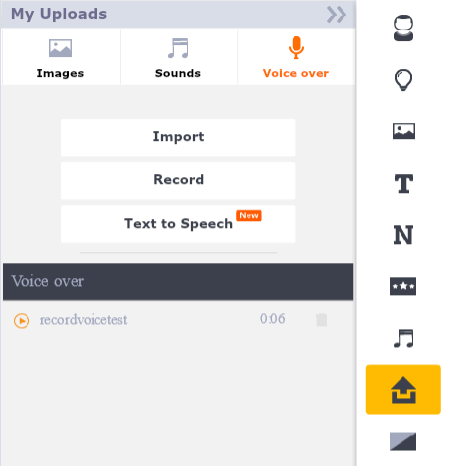
You can also use the “Upload” or “Record Voice” buttons to add narration or special voiceover to your video.
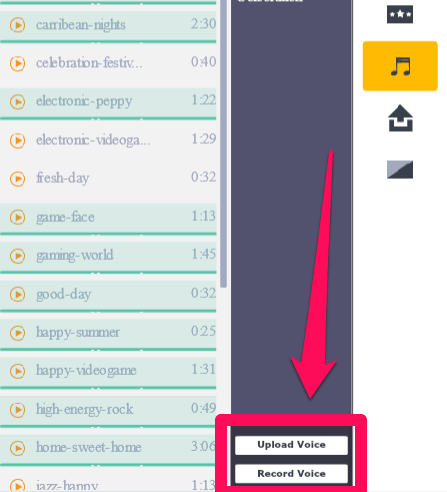
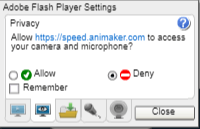
If you choose to record your voice, you’ll need to give Adobe Flash permission to access your camera and microphone. It looks a little sketchy, but since Animaker is a Flash software this is the interface it uses.
You may also see a small pop up like this from your browser:
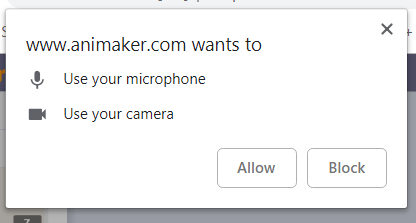
In either case, you’ll need to click “Accept” or “Allow” in order to continue. Then, you’ll see the following recording screen:
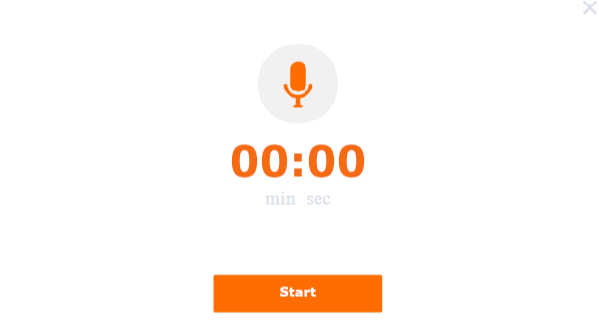
Pressing the Start button will immediately start the recording, which can be annoying if you’re used to a count down. Additionally, the recording window covers your video canvas, so you must know your timing ahead of time or adjust your video after recording the voice over.
You can also use the “Upload” panel to add a pre-made recording. Any files you upload to be used as audio should be MP3s.
The text-to-speech feature advertised actually redirects to a subprogram called “Animaker Voice” where you can import a script and create the text to speech voice over your desire. However, it only allows you to download a few of these recordings every month.
Scenes, Animations & Timelines
Scenes are the components that make up your final video. They allow you to switch between settings and transition into new information. In Animaker, scenes are accessible on the left-hand side of the program interface.
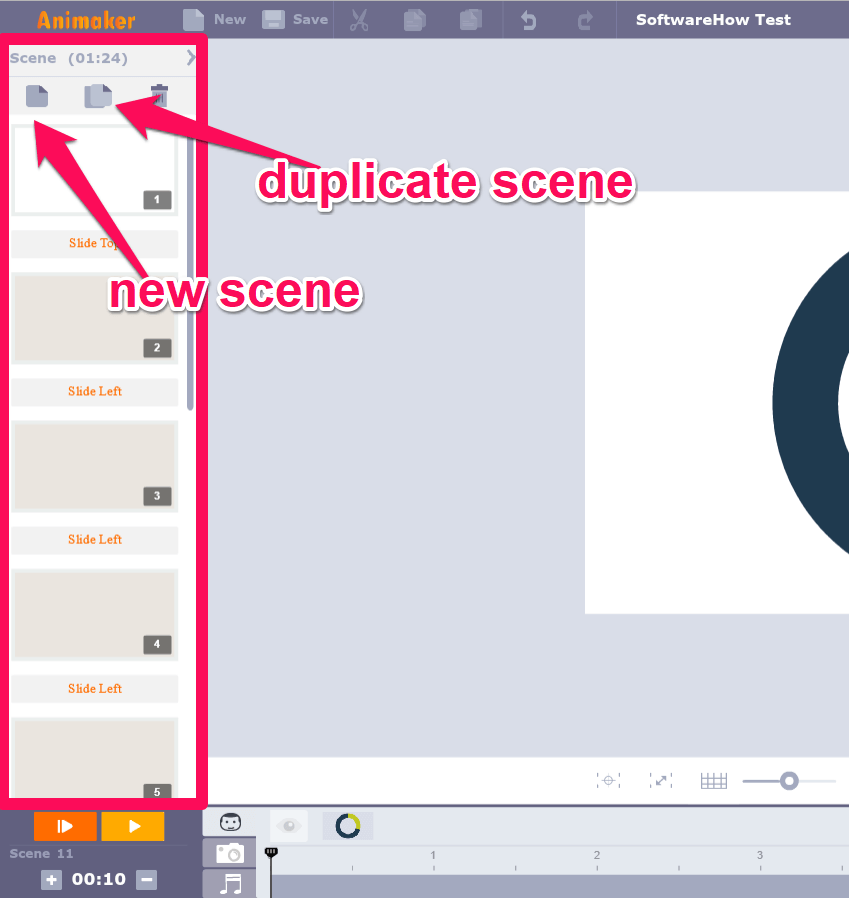
Each new scene will present you with a blank canvas. From there, you can add backgrounds, props, characters, and any other elements you need. Once all the elements have been placed, you can use the timeline to manipulate them.
The timeline is the bar at the bottom of the workspace area. On the timeline, you can change the timing for when your objects appear and disappear, as well as edit any timing for music/audio tracks.

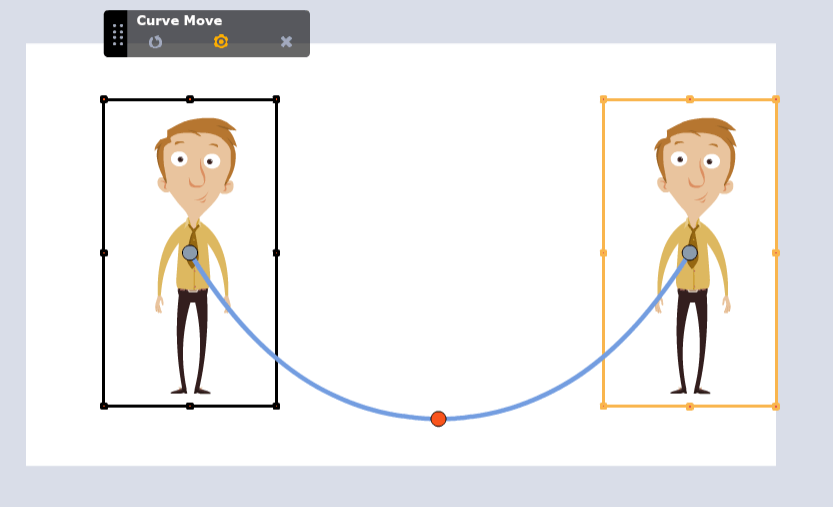
If you click on an object, you can change the size of the yellow zone to decide when it enters/exits a scene, and alter the orange zone to change the animation effects on that character. For example, some characters may have curve paths that you would like to occur at a certain moment.
You can use the media tabs to switch to other types of timeline elements besides just characters and props. You can click the camera icon to add zooming and panning features or click on the music icon to change the different types of audio you may have added.
Lastly, you’ll want to make good use of Animaker’s transitions. These transitions can be applied between scenes to make cool effects or simply a smoother switch between ideas.
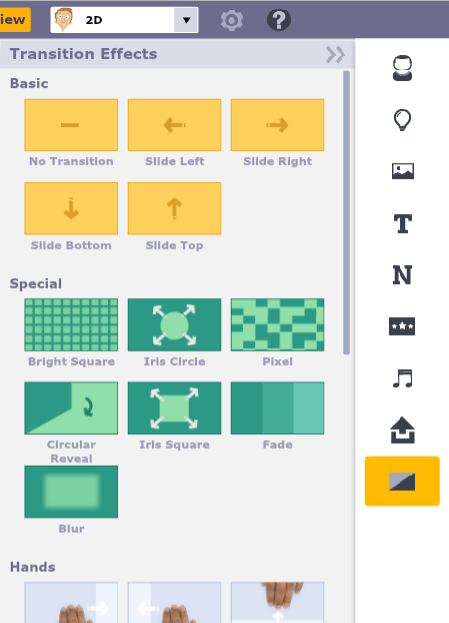
All transitions appear to be available to free users, which is a nice bonus. There appear to be around 25 transitions. This tab will also show you some camera editing effects you can use as well, such as “camera left” and “camera right”, which will show up in the camera tab of your timeline once applied.
Before you can export in Animaker, you’ll need to save your project. Then, click the small gear at the top of the workspace and choose “Export”.

After this, you’ll see a small export screen where you can choose how to format your final video.
As you can see, there’s a small message that says “You can publish your videos to Youtube or Facebook using the Free plan”. Paid users will also be able to download their videos.
If you do download a video, you will be able to pick between SD and HD quality (depending on your plan), and the video will be unbranded.
For those who want to upload to YouTube, you’ll need to link your Google account by clicking the “Add Channel” button. You’ll see a prompt that needs to give Animaker access to your account, but these permissions can be reversed at any time. Once your accounts are linked, you’ll be able to export to YouTube. Video quality will depend on the plan you have. For example, Free users can only export to YouTube in SD.
Additionally, free users will notice a small Animaker logo on their videos in the bottom corner. This branding cannot be removed without upgrading to a paid plan.
Since Animaker’s export options are pretty limited, I reached out to their support team to ask if they offered a “pay per export” instead of a “pay per month” plan. However, it appears they do not.
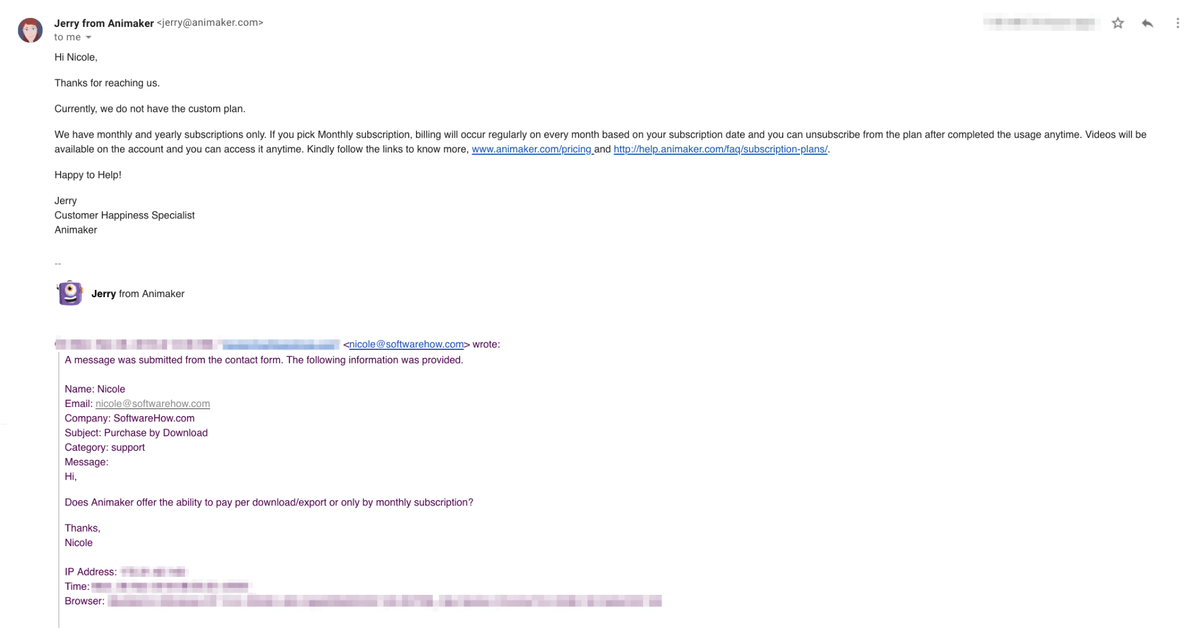
This means in order to get the best quality videos, you’ll need to pay the monthly rate and stick to your plan’s export limit.
Redenen achter mijn beoordelingen
Effectiviteit: 4/5
As a DIY animation software, Animaker is pretty efficient at what it does. You’re able to create videos with ease, utilize templates, or expand across a blank canvas with only your own creativity.
It contains the tools you need to succeed such as audio features and customizable characters with one exception – a very limited export feature, especially if you’re on a lower-tier plan (even paid users will see some limitations on video quality and exports per month).
Altogether, Animaker can get the job done when you make good use of it and go beyond simple template videos.
Prijs: 4 / 5
Although Animaker is a freemium software, it is ultimately much cheaper than many of its competitors for equivalent features. The baseline free plan offers access to every tool aside from exporting as a video file which is plenty of space to get started and try things out.
There’s a decent amount of characters and media files available for use, and paid users will find a plentiful range of materials as well. Overall, it’s a very fairly priced DIY animation software.
Gebruiksgemak: 3/5
The interface of Animaker is pretty easy to use. Everything can be understood without a tutorial (although one is offered), and all functions are intuitive. However, I am obligated to reduce stars for two main reasons.
First, there is no autosave function. This may seem like a small complaint, but since this software is web-based it is especially vulnerable to accidental tab closes or browser crashes, and having to constantly worry about saving your work is a hassle.
My second reason to withhold a star is that while testing the software I experienced around 3 – 5 freezes in about just 2 hours of use. These freezes never resolved themselves, and instead, the page had to be reloaded (thus losing all my work due to the lack of autosave). So while Animaker is fairly easy to use on the surface, it has some bugs that still need to be worked out.
Ondersteuning: 5/5
If you’re ever unsure about how to do something in Animaker, you won’t have to wonder long. The program includes an extensive library of tutorials, knowledge/FAQ articles, lots of community resources, and a support team that’s quick to respond to inquiries. It’s a pretty comprehensive system and should leave you with no worries.
Animaker Alternatives
PowToon (Web)
Powtoon is also a web-based software, but it boasts that it can be used both for traditionally animated videos and for making more interesting presentations (as opposed to your standard PowerPoint). Its interface is very similar to Animaker as well as other animating programs, which makes it easy to switch or learn quickly. There’s also a fair amount of free media and template content.
We’ve done an extensive review of Powtoon, which you can check out to learn more.
Explaindio (Mac en pc)
For those who would rather have a full-featured software application, Explaindio 3.0 may fit the bill. While the interface is more complex and the library of default media is more limited than most freemium or web-based solutions, it offers more editing control and features than its competitors. It’s also a standalone software, so you’ll only pay a one-time fee and won’t be dependent on the internet connection to do your editing.
We’ve also done a detailed Explaindio review hier.
Ruwe korte broek (Web)
If you want to stay web-based but Animaker doesn’t seem like a good fit for you, consider trying out RawShorts. It’s also a freemium software for creating animations, utilizing a drag and drop interface as well as the same basic timeline and scene model that many other creator platforms have. Although the features offered are very similar to Animaker, it offers a different price set up and the ability to purchase downloads instead of a subscription.
U kunt ook onze lezen beste whiteboard-animatiesoftware roundup review for more options.
Conclusie
If you’re looking for a DIY animation software that can produce good quality results without too much pain for you as the creator, Animaker is a great choice. It offers plenty of tools and materials to get you to the finish line, and you can even get started for free before committing to anything.
So, what do you think about this Animaker review? Have you tried this animation tool? Leave a comment below and let us know.
Laatste artikels